Those of you who know me, you know I have a soft spot in my heart for power tools. Something about building projects, I love it! So when I started exploring vegetable gardening, I saw a project for making self watering containers to plant in, and I thought it'd be a good thing to try! My tools are in storage in Lethbridge, so I got to use my Dad's.
The goal of this project is to make a container that waters your plants from the bottom, so you don't have to worry about them every day (perfect for a summer shift worker like me!). This project is taken from my new gardening book The Vegetable Gardener's Container Bible by Edward Smith
For this project you need
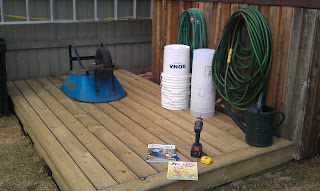 |
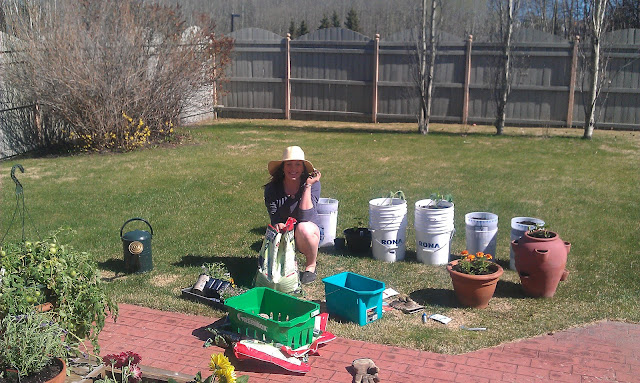
Get your supplies!
(Thank you Dad for making such a
beautiful deck for me to put my garden on!) |
- 2 buckets (big ones, 5 gallons preferably) for every container you want to have at the end
- Drill that will make a hole in thick plastic
- Tin snips (something that will cut thick plastic)
- Tape measure
- Plastic down spout (4" per container)
- Permanent marker
Step 1. Get your buckets! I got buckets for a dollar from Booster Juice, they're not 5 gallons but big enough for my needs. My Dad also picked up some 5 gallon ones from Rona for me. I had enough for 5 containers at the end.
 |
| Step 2. |
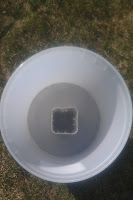
Step 2. Drill holes all the way around the inside of the small circle of on the bottom of the bucket that will become the inside bucket.d
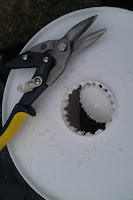 |
| Step 3. |
Step 3. Using snips, cut the circle out by cutting between the drilled holes. Watch your fingers on this step! I pushed the circle out and cut my thumb pretty bad!
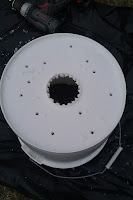 |
| Step 4. |
Step 4. Drill a dozen holes on the bottom of this bucket, this will allow excess water to drain out.
 |
| Step 5. |
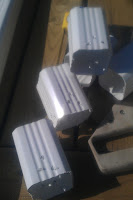 |
| Step 5. |
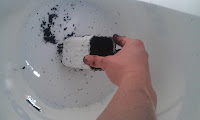
Step 5. Cut a 4 inch piece of downspout, and drill about 3 holes on each of the four sides, keeping the holes within an inch of the bottom of the pipe. This will be the wick that draws water up to the inner bucket.
 |
| Step 6. |
Step 6. Place this piece of pipe into the center of the bottom bucket. Place the bucket with the holes into this bucket.
 |
| Step 7. |
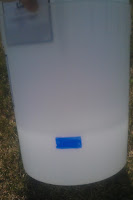
Step 7. Hold the buckets up to the light so you can see the silhouette of the inner bucket. Using your permanent marker, draw a rectangle onto the outside bucket, with the top of the rectangle meeting the bottom of the inner bucket. The rectangle should be about an inch deep, and two inches long. This is where you'll be able to add and check water in this self watering bucket!
Drill and snip the rectangle to take it out. I drilled holes into each corner, then one or two in the middle of each line so I could use the snips more easily. Remember to make it as smooth as possible since you'll be putting your precious fingers in to check water a lot!
 |
| Step 8 |
Step 8. Fill the pipe with moistened soil and place back into the center of the bottom bucket. Replace the inner bucket (the one with the holes). Line up the bottom hole of the inner bucket with the soil in the pipe so there is little to no space where there is no soil. The soil you will be putting into the inner bucket will connect with the soil in the pipe so water will be wicked up to the plant's roots. Yum Yum Plant food!
 |
| Step 9. |
Step 9. Fill the inner bucket with CONTAINER SOIL. **Something new I learned - regular dirt is not the same as the soil you need for containers! It would dry out too fast! So look for the good stuff!
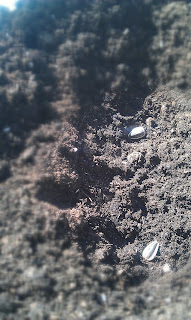 |
| Sunflower seeds! Grow! Grow! |
Plant your plants and move them to their location FIRST before you add the water to the bottom, through that hole you cut out earlier. It will be extra heavy once you add the water.
Another tip - Write your plant names on the buckets so you don't forget what you've planted!
 |
| Happy Gardening!!! |
 My tomatoes are DELICIOUS! Since I bought the plant from a greenhouse, they were already growing before I got them. So I woke up one day for work, and noticed thee was more than just green in my plant! I was so excited!


 7. Bake for 4 to 5 minutes at 400 F. Really watch your chips, they can burn really fast. You want them to be brown and crunchy and chip-y. Cooked too little and they'll still be chewy, cooked too much and they'll be burnt.